
Even if you have time to prep, there is often no need to copy a template for students. I love teaching them how to fold and cut the paper because it allows them to practice listening skills, work on following directions, and gives them experience with manipulating paper in different ways. Plus it makes them even more INTERACTIVE!
There are so many that I could share, but I narrowed it down to three...the shutter fold, the petal book, and an easy pocket.
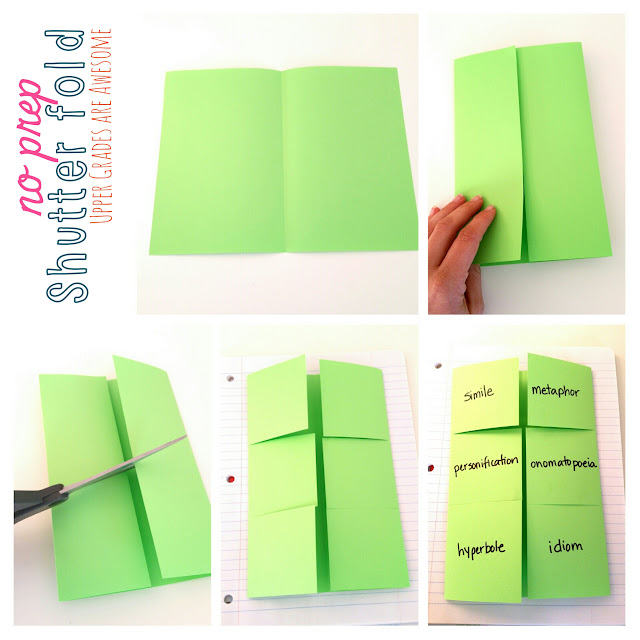
1. Fold the paper in half and open it up.
2. Fold the sides in to match the center.
4. Cut the shutters. I choose to make six, but you can easily make two to eight.
5. Label the outside and write definitions, examples, draw pictures, etc. on the inside.
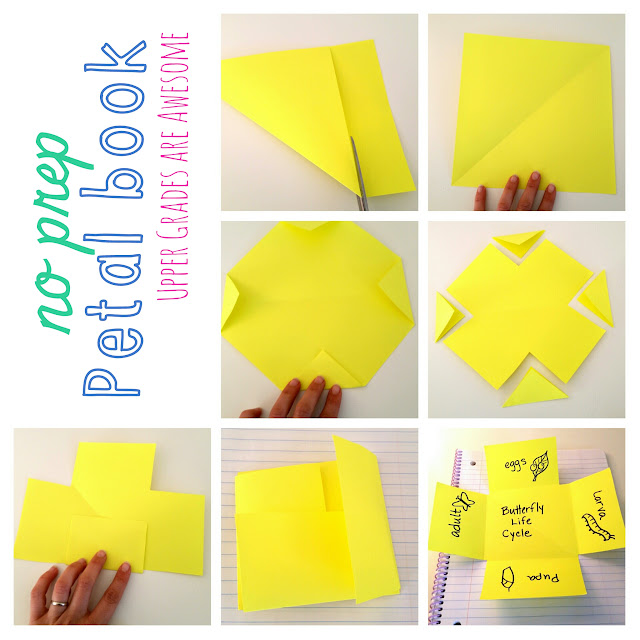
1. Fold the paper to make a square and cut off the excess.
2. Open it up and fold the corners in about an inch.
3. Cut off the corners (you can save these and make little flaps for another interactive notebook page!).
4. Fold the "petals" in towards the center.
5. Add the details!
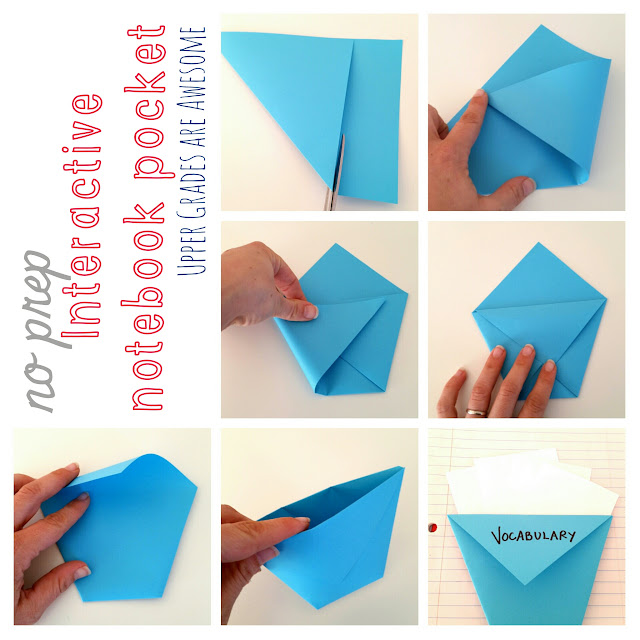
1. Fold the paper to make a square and cut off the excess.
2. Keep the paper folded so that it is a triangle. Keep the base of the triangle facing down and the right angle pointing up.
3. Take one of the other points and fold it across the triangle meeting about halfway along the opposite edge.
4. Do the same with the opposite point, lining up the edges.
5. Fold the top point of the top layer of the triangle down over the folded pieces.
6. Flip the pocket over and fold the other layer of the top point.
7. Glue the pocket in, label, and place things inside.
For more bright ideas from other bloggers, please browse through the link-up below and choose a topic/grade level that interests you. Thanks for visiting!


Gotta' love no prep! So often those ideas do come right in the middle of a lesson! The pocket especially is awesome!
ReplyDeleteGreat tips! I always used INs, but never with the glue in pieces because I hated the trouble, but these tips would make it much easier and I'm sure my students would love the flaps over their hand-drawn organizers! Thank you!
ReplyDeleteI love, love, love using the shutter fold fold a range of topics in ELA. I'm adding the other 2 to my bag of tricks as well. Thanks so much!
ReplyDeleteHello Mrs Sykes
Love it! I always kept a supply of colored paper in my room just for moments like these!
ReplyDeleteKrazy Town
These are great! I love activities that can be used anytime! I love the idea of using colored paper..
ReplyDeleteSally from Elementary Matters
Awesome post! I have a book that is over 20 years old with these foldables. It cracks me up because they were called "study guides" and not foldables for "Interactive Notebooks." I love that book, but it lacks a little in the visual department. Your visuals were great! I need that:).
ReplyDeleteLove this post. I pinned it a few days ago but forgot to write a comment! Thanks for sharing.
ReplyDelete