
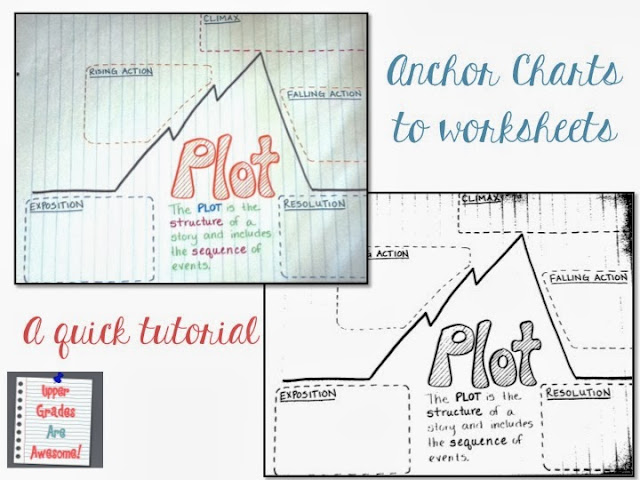
We'll be doing a lesson on plot when we return from our fall break, so I created the basic anchor chart and left blanks where we are going to fill it in as a class. Then, I snapped a quick shot with my cell phone and emailed it to myself.
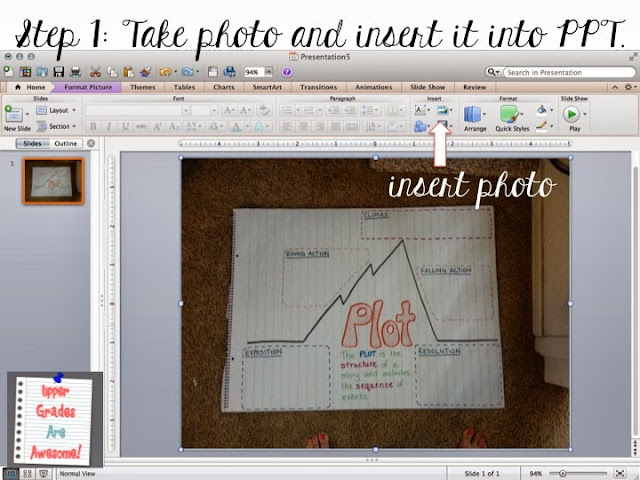
Drag the photo into PPT or use the "insert a picture" tool. I don't want my students to admire my pedicure so it is time to crop this baby!
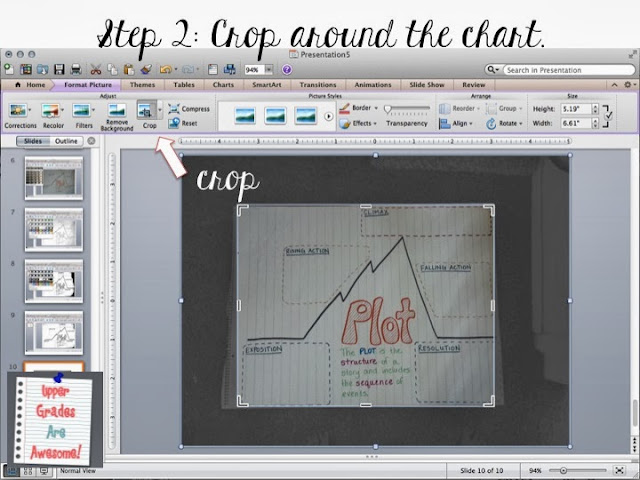
You can use the "remove background" tool, which either does a fantastic job or a strange one, or just use the crop tool to get rid of whatever happens to be in the background that you don't want. Bye-bye toes!
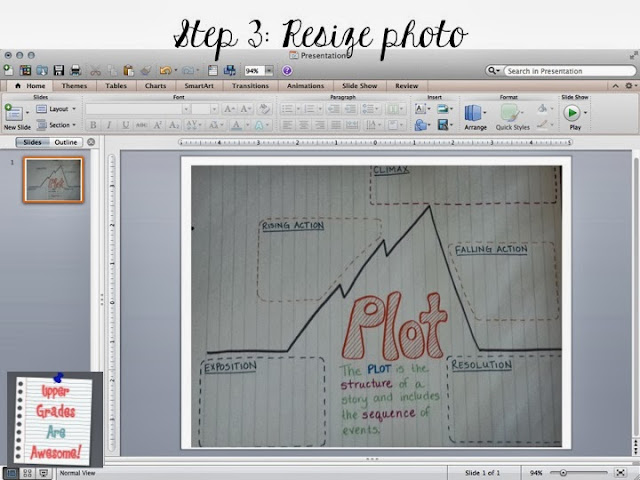
Resize the photo so that it fills up most of the slide.
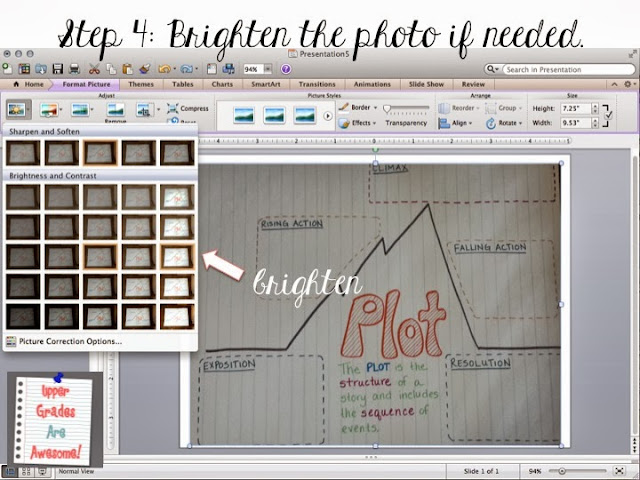
Since I didn't bother to get out my DSLR or even open the blinds this photo needed some brightening up. Your photo will probably be better quality than mine. Decide if you need to brighten it up or not.
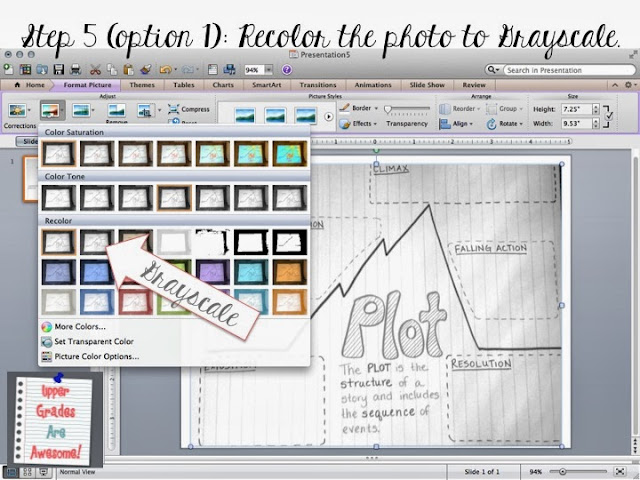
There are two options that I have used to make my black and white worksheet. It depends on the photo quality, lighting, and sometimes the colors I used on the anchor chart. Here is the grayscale option. You can see that most of the chart is a gray color, and this will mean more ink when you copy it. To get more of a white try option 2.

I find that the "Black and White: 50%" tool usually gets a great contrast. Unfortunately, because I didn't consider lighting when I took the photo I got some nasty shadows on the side. If this happens I would either use option 1, or just crop the shadows off.
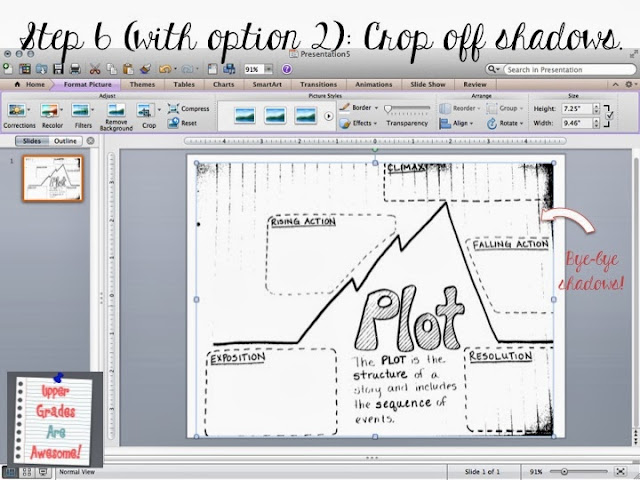
Now most of the shadows are gone and I am ready to print my worksheet! I hope my first tutorial was useful!
Thanks for the tutorial!
ReplyDeleteGreat idea for anchor charts!
ReplyDeleteI can't believe I never thought of that! Such a cool and yet simple idea. By the way I am a new follower! I absolutely adore the look of your blog. :) Pretty and calming colors!
ReplyDelete